Creating Class Teams based on Edval Timetable
To create Class Teams based on the timetable, first we get an export from edval containing the class names in excel –
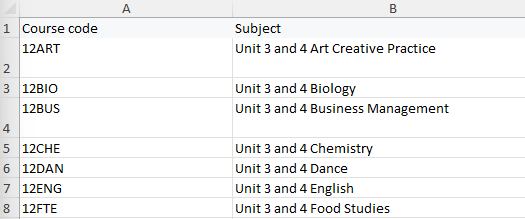
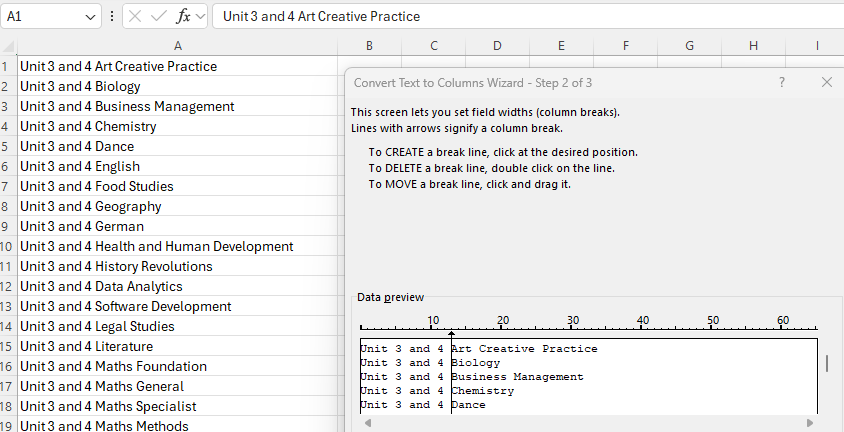
We filtered the classes from an edval rotation export to only show Year 12 classes for this example. We like to have classes in the format “Year 12 Subject 202X” so we copy the subject name and paste it to a separate excel page. Using text to column edit out the unused characters –
The Powershell command we want to use is
$group = New-Team -displayname “Year 12 SubjectName 2026” -Template EDU_Class
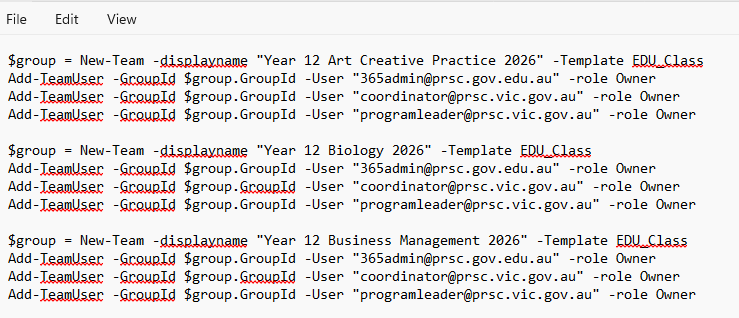
Using Excel, we build the command out chopping the command up into columns A,B and C with the information for each subject and combine them with the command =a1&b1&c1 in column F as the example below shows-

There are a few options from but the easiest way forward is to cut and past them into notepad.
Once the commands are on notepad we add in the teams owners with the command
Add-TeamUser -GroupId $group.GroupId -User “rid@prsc.vic.edu.au” -role Owner
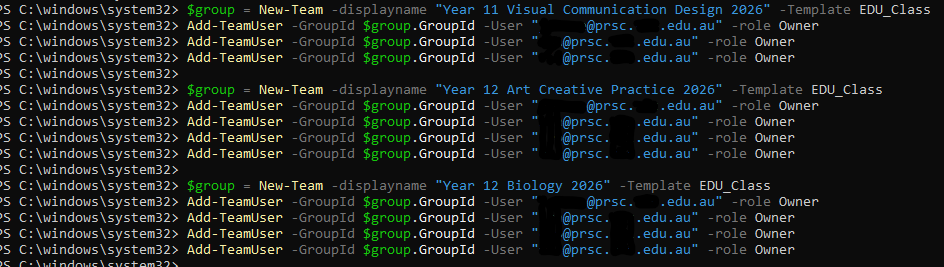
Now we open Powershell and connect to Teams using the command
Connect-MicrosoftTeams
Then paste the commands and let Powershell do its thing –
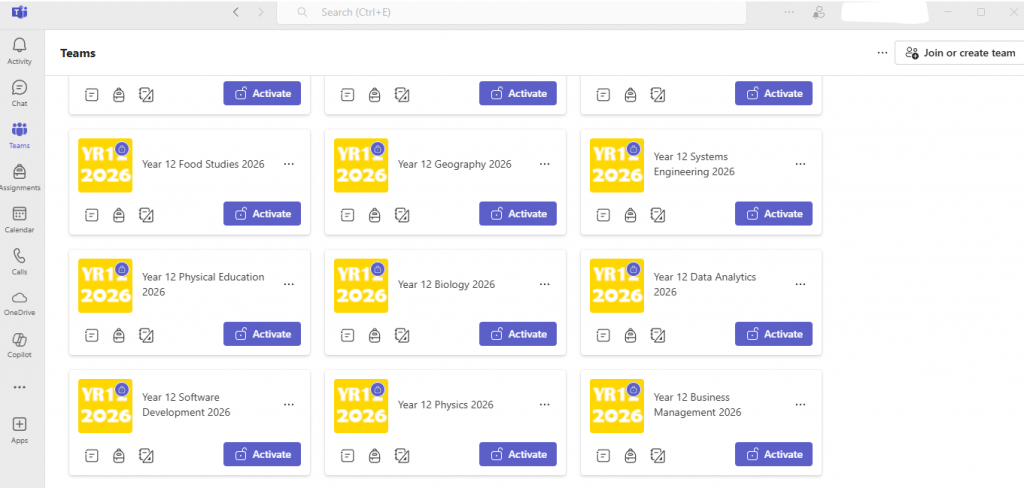
The newly created teams should be sitting in Teams awaiting activation with the appropriate owners, you can check them and change settings like icons and permissions before activating them –
Now the basics are created we can start organising members to be added to the Teams.
Using the export from Edval we can copy out the subject codes, for year 12 subjects we look at the CourseCode and Class id –
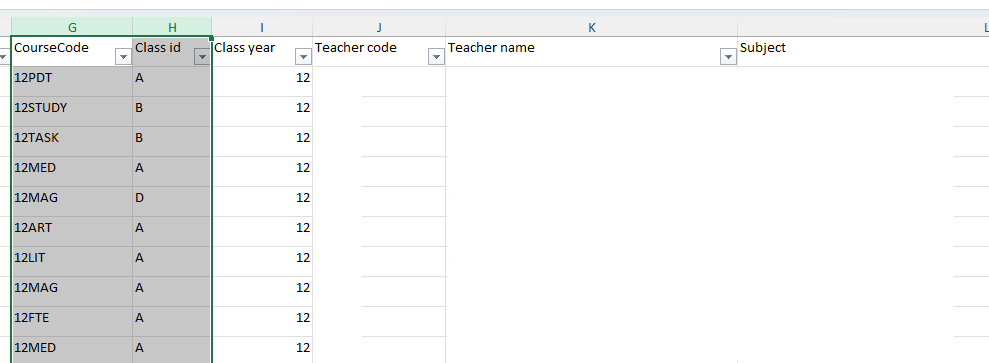
You can either create a subject group using the CourseCode alone or create a class group by combining the CourseCode and Class id using the formula =G2&H2 in excel.
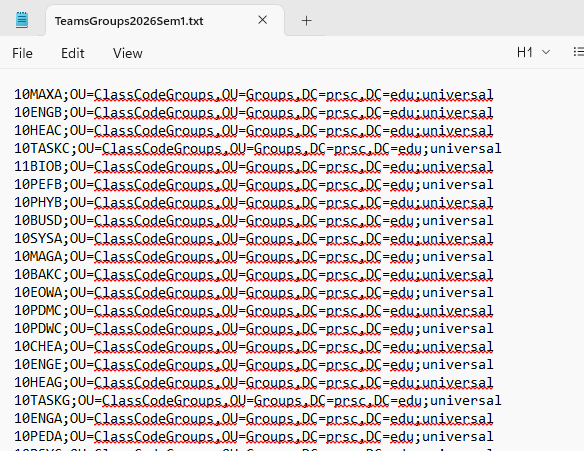
Once the desired fields have been copied to a separate sheet in excel we add the line ;OU=ClassCodeGroups,OU=Groups,DC=prsc,DC=gov;universal by using the same formula as before. We also create an OU in AD called ClassCodeGroups

Then save the files as a text file – We’ve called ours TeamsGroups2026Sem1.txt
We then use a powershell script to create the groups in AD referencing the text file we have created.
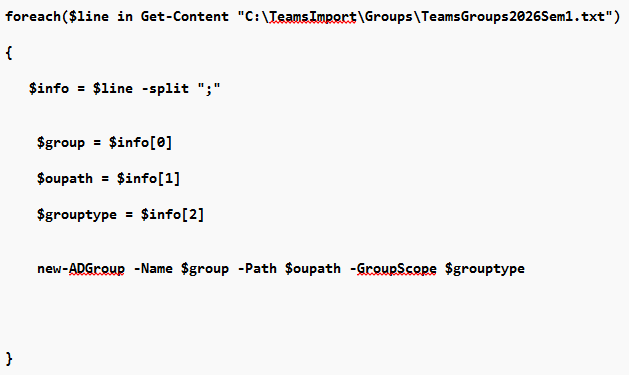
After the script is ran the groups should appear in AD –

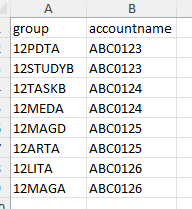
Now using the same export we extract the students and classes, export the Code (Student Code), CourseCode and Class id

Because our groups are based on classes we combine the CourseCode and Class id in Excel with the formula =B2&C2 then add it to the first column to work with a script that adds users into groups.
You want to be left with something similar to below with the column headers being group and accountname
Save the file as a csv then using the following powershell script we add the users to the AD groups.

You can repeat this step for Owners (Teachers) and simply elevate their permissions when you import the group as a whole.
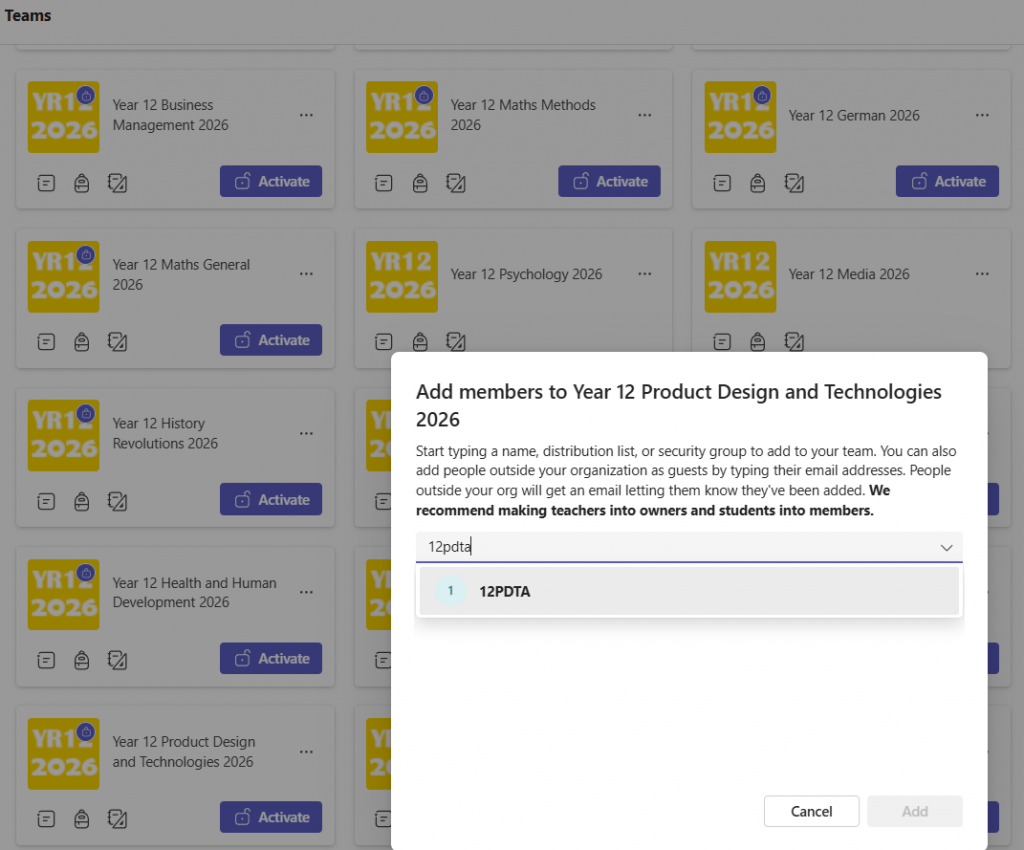
Once Azure has sync’d with your local AD you should be right to start adding the groups into Teams.
You should be all done!
